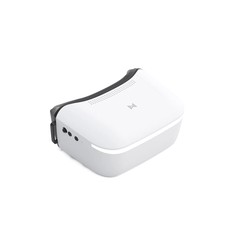
A comprehensive guide to FPV drone technology
Background
Since the mid-2000’s hobbyists have been building and flying quadcopter drones.1 Since then, the technology has been improved – and commercialised.
Despite the commercialisation, an incredibly diverse and open selection of hardware and software is available to hobbyists, in addition to the off-the-shelf ready-to-fly (RTF) drones.
This article aims to provide an overview of the technology and setup of hobbyist FPV (first person view) drones, as well as my personal setup. It is aimed at technical individuals starting the hobby.2
When I got started, there was a lot of terminology and standards to cut through, so I will cover the protocols, components and a bit of history.
For FPV drones, see this excellent article: https://www.currykitten.co.uk/the-history-of-fpv/ ↩︎
See also: https://oscarliang.com/fpv-drone-guide/ – a similar guide, but from another perspective. The rest of Oscar’s blog is worth your time – he covers literally everything you need to know about FPV drones and equipment as it becomes available. ↩︎
Types of drones
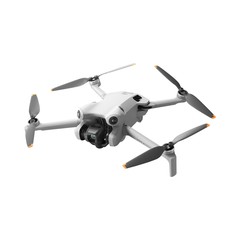
Generally there are 2 main types of quadcopter drones: “camera”3 and “FPV”.4
Camera drones are predicated on filming, and are easier to fly. They are typically flown via screen integrated into a controller, possibly via a smartphone. They tend to have a lot of autonomous stabilisation features – for example, altitude hold, position hold, angle-based control. Given the stabilisation, they can be flown more easily on a screen that isn’t head-mounted or by line of sight.
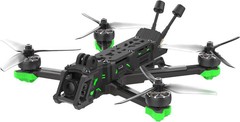
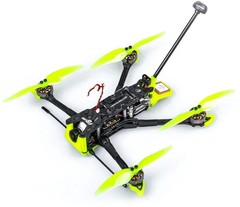
FPV drones – the focus of this article – are designed for speed and acrobatics. They are much harder to master, but in my opinion, more intuitive to fly; More importantly, they are much more fun as they are unconstrained vs camera drones.
Flying modes
Angle/Level mode
Angle mode is the easiest to fly in. The drone will self-level and tip relative to the position of the stick. It requires a gyroscope and an accelerometer to work. Camera drones are typically flown in this mode.
Whilst this is easier to fly at first, it’s also much more restrictive; you can’t do any acrobatics such as dives/rolls/loops etc. The best analogy I can come up with is it’s like cycling with stabilisers on.
Acro mode
Acro mode is really hard to master at first. Keep at it, and you will find it much more intuitive and fun in the end! Flight is much smoother too. Only a gyroscope is required.
Horizon mode
Horizon mode is somewhere in between. It’s like acro mode, but with a limit on the maximum angle of the drone. It’s also what manual mode is on DJI drones unless you disable the altitude limit.
Position/alititude hold
FPV acro drones typically have no ability to hold position or altitude – instead requiring the user to master throttle control. Camera drones will typically have a mid-position allowing control of the rate of ascent/descent.
Altitude requires a barometer, possibly an ultrasonic sensor. Position hold requires a GPS module and maybe an optical flow sensor.
Protocols
The last RC link I used was back in the 90s, and it was a simple 27MHz or 49MHz 2-channel (forward/reverse, left/right) link. This was to control a toy car, the standard at the time for toys and hobby-grade RC vehicles. It was an analog system using frequency modulation.
The status quo has evolved significantly since then. Almost universally, the standards support at least 8 channels, are digital, and on the (crowded) 2.4GHz ISM band.. As it turns out, it’s possible to make good use of 8 channels – covered later in this article.
The most well-known protocols are Express LRS, TBS Crossfire, Spektrum DSMX and FrSky.
As of the last few years, the emerging victor is Express LRS. It is open-source, and based on the LoRa modulation scheme.
LoRa can operate at incredibly low power with long range – 100km is not unreasonable with the right setup, even at 100mW. The modem parameters allow trading data rate and compromising on latency for range.
In 2020 I designed a LoRa based remote control for use in operating theatres. LoRa was a great choice – it allowed for reliable communication through walls and corridors within hospitals with no issue.
The use case for radio control of drones is interestingly different. Packet loss doesn’t matter too much with a drone! Given there are hundreds of updates per second, dropping a few packets won’t be noticeable. The ratio of packets received to packets sent is known as link quality. Whereas with the hospital remote, the button press must be received.
Express LRS has recently seen some innovation. It was already available in a 2.4Ghz and 900MHz5 variant. The 900Mhz variant allows better range and penetration generally speaking, but the 2.4Ghz variant is so good it doesn’t matter. People flying long range drones (40km or so) tend to use 900Mhz.
Gemini is a project to use both bands at once with diversity as well, for 4 independent channels. This is rather special, for the ultimate radio link.
Radiomaster do a transmitter module and receiver too.
ExpressLRS also has some other clever features such as antenna tracking, model matching and dynamic transmit power. It also support basic telemetry and MavlLink for full mission planner integration.
868MHz in Europe ↩︎
Transmitters (controllers)
There are a lot of transmitters available, and in 2024 they are advanced, open and modular. It’s common for a transmitter to have:
- A screen, colour or monochrome – for telemetry and configuration
- A module bay – to support different radio protocols and higher power transmitters
- A USB port – for charging and simulator use
- Many switches in addition to 2 gimbal sticks
Nowadays the firmware to use is EdgeTX, a fork of OpenTX. Like practically everything else in the ecosystem, it’s open source, and it supports a lot of hardware. There are dozens of transmitters that support EdgeTX, all from Radiomaster and Jumper do.
Note that the radios that don’t support EdgeTX tend to be compatible with a single proprietary protocol too and aren’t as flexible.
These features stood out to me:
- SD card support for yaml based config files. This allows me to version control the configuration with git in this repository.
- Standardised menu system to allow easy configuration on the controller without the need for a computer.
- Voice announcements for telemetry, modes etc. Far more useful than it sounds as you can’t see the controller with FPV goggles on.
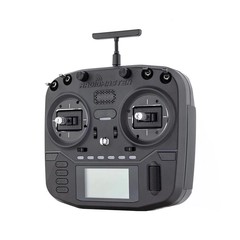
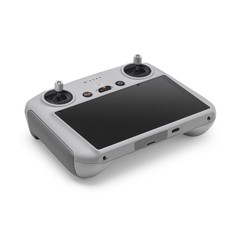
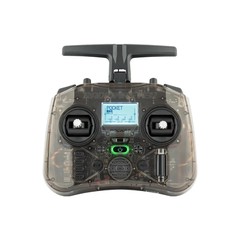
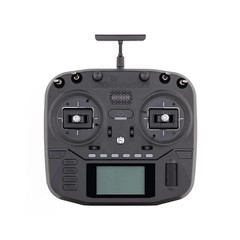
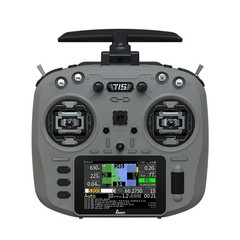
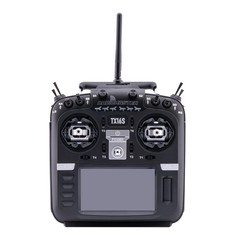
If you’re after a transmitter, consider the 4 images in this section. Bear in mind that the most expensive one, the TX16S isn’t necessarily the best – as it’s absolutely huge meaning it’s a pain to bring with you. That’s why I like my Pocket.
Control schemes
With the exception of the DJI motion controller6 that comes with the DJI Avata everyone uses a 2-stick controller. There are several control schemes, but I’ve never heard of any one using anything other known commonly as “mode 2”. Here’s the scheme:
If we assume axes where Z points up, Y in front and X to the right:
- Yaw: Left stick, left/right means rotating anti-clockwise/clockwise on the Z axis.
- Pitch: Left stick, up/down means rotating forwards/backwards on the Y axis.
- Roll: Right stick, left/right means rotating anti-clockwise/clockwise on the X axis.
- Throttle: Right stick, up/down means increasing/decreasing the thrust. There will be a hover threshold – no altitude hold with FPV in general!
Traditionally there have been a lot of options for controllers, but with proprietary protocols specific to the manufacturer.
To turn at low speeds you will need to perform a “co-ordinated turn” – this means yaw and roll at the same time. Yaw controls where you look, not (directly) the direction of travel. It does of course influence what roll means (where your thrust goes) hence the need for co-ordinated turns.
At high speeds, yaw is less important – you can turn with roll alone due to the orientation of the drone. This is the biggest difference versus fixed-wing designs – the control scheme basically changes depending on speed!
I won’t go into any more detail around the controls and learning to fly. For that I suggest Josh Bardwell’s video series.
Note that the right gimbal is typically centre-sprung as usual, but the left gimbal is loose and fully down for 0% throttle. This can be confusing coming from an Xbox controller or similar!
This uses an gyroscope to control the angle of the drone. Aiming at a location with a cursor in the goggles. Intuitive, but not as precise or quick as a stick controller. ↩︎
Receivers
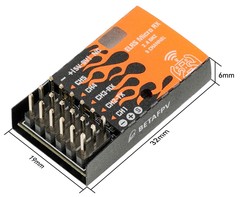
Receivers are generally tiny, modular boards that interface with the flight controller. Some flight controllers (particularly those on Tiny Whoops) are integrated into the same PCB meaning you can’t swap them out.
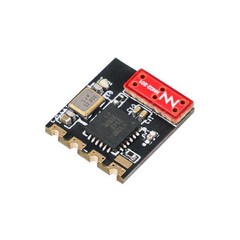
For Express LRS, they tend to be based on an Expressif ESP SoC plus a Semtec SX LoRa modem. They have WiFi, thanks to the ESP which allows for OTA firmware and settings updates.
The modules speak to the flight controller either using SPI or Serial, with several protocols.
The serial modules are more common and preferred, as they allow firmware updating via passthrough which is more convenient than via WiFi.
For (traditional) drones without a flight controller such as fixed-wing and cars, the receiver has one output per channel often using PPM to control servos and ESCs directly.
Flight controllers
Right now the status quo for flight controllers is an ST micro-controller attached to various sensors – at least a gyroscope but also an accelerometer, GNSS module, magnetometer, barometer and optical flow sensor.
Starting from experiments with Wii remotes, there have been a long line of firmware projects over the years. This article explains it best!
All you need to know are the current main contenders:
- Betaflight: Predicated on quadcopters, focused on flight performance
- iNav: Better for autonomous flight across fixed-wing and quadcopters
- Ardupilot: Universal. Ground and water vehicles too! Not great for acrobatics.
Betaflight, like iNav has great companion software that allows for easy configuration and firmware updates.
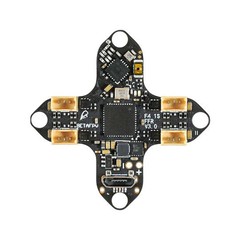
There are varying levels of integration – some “flight controllers” are 5in1! Motor controllers, power distribution, flight controller, control receiver, video transmitter. This is common in Tiny Whoops. The advantage is there’s less to mechanically break (especially soldered wires) but if something breaks you have to replace the whole thing.
In my experience they are less expensive overall because the mechanically fail less.
Motor controllers
Modern motor controllers can deliver a lot of power – up to 50A or so. Combined with powerful brushless motord and high-current LiPo batteries it is possible to produce extremely powerful drones. See this video to see just how far a hobbyist can go!7 Spoiler: 400kph, 9KW peak).
Yes, a hobbyist, not a professional outfit! ↩︎
Analog Video links
VTX: Video transmitter.
After experiments with ski goggles and baby monitors for the first consumer FPV flights in the 2000’s by team blacksheep, up until 2019 the only type of link was an analog PAL or NTSC 1.2, 2.4 or 5.8 GHz system - 5.8GHz is the most common.
Given the way PAL and NTSC works, and the limited bandwidth, the colour reproduction and resolution is mediocre. It is good enough though!
With these systems, most analog drones have an OSD chip inside which takes the raw signal from the camera and overlays flight information. This chip is usually connected via SPI, and is actually rather similar to the chips used for old VHS VCRs in the 90’s! To mix the signal, most VTXes will have a video in and out to loop in the flight controller.
Another innovation is flight controller based VTX control. Most VTX units will come with a button and an LED to allow laborious setting of the video transmission frequency; however it is possible to configure the VTX directly via a serial protocol – TBS Tramp or SmartAudio. They are similar. SmartAudio gets its name from the fact that the control signal was commonly multiplexed with the audio signal from the microphone.
With the right antennas and amplifiers, it is possible to get 50KM of range.
There are several standards (bands) for channel/frequency mapping: Fatshark, Raceband and more. This article describes the systems well. Understanding of the bands allows multiple people to fly at once and avoidance of interference from WiFi networks among other things.
Make sure you understand the legalities for transmitting at a given frequency in your country.
Digital Video links
In 2019, DJI released a digital video system for FPV DIY drones. Undeniably expensive at the time, it allowed 60FPS 1080p at reasonably low latency and long range. The system uses h.264/h.265 as the video codec, and requires a bi-directional link. The same link can also be used for RC control.
Since then, three other systems have arrived: Walksnail,8 HDZero and OpenIPC. All are 2.4 and/or 5.8GHz.
Walksnail was developed by ex-DJI engineers (rumoured at least) and seems to be roughly equivalent but with lower cost and more options for VTXes, googles and cameras. It seems to be the one to get in 2024. The “Avatar Goggles L” are particularly good value.
HDZero is a little different. Expensive headset, better value VTXes and cameras. It does not use a traditional video codec, but instead encodes the raw pixel data over the air with some clever modulation using an Analog devices HD video transceiver. The result is the best latency.
Surely the name is a joke? ↩︎
Batteries
In the 90’s I remember using NiCd and MiMH batteries for any portable device and RC car. Lighter than the lead-acid alternative at the time, but compared to today’s technology, not relatively power or energy dense. They also suffered from the memory effect.
Today, the standard is the LiPo (polymer electrolite) and Li-ion (liquid electrolite) batteries. Technically, LiPo is a subset of Li-ion chemistry; though when people say “Li-ion” they usually mean the liquid electrolite variant above using cylindrical cells.
LiPo batteries are the most common for FPV drones: racing, freestyle, etc. This is because they are able to support the high discharge rates required when performing acrobatics. They have a high specific power – around 10x vs Li-ion.
Li-ion batteries are often used where flight time is more important – for long range drones. They have a higher energy density – around 20% more vs LiPo. As the power density is less, a given drone will not be able to perform acrobatics nearly as well. This video explains it.
LiFePO4 and LiHV are more options. The latter is popular for 1S micro drones, as the energy density is higher and energy density matters a whole lot more when your drone weighs 20g. LiHV is scary though, if you’re used to charging to 4.2v; they go up to 4.35v!
Make sure you never charge the batteries unattended, and on a fireproof surface. They can catch fire (in a self-sustaining way!) if overcharged or damaged – something more likely when the battery is exposed and subject to impacts from poorly executed acrobatics.
If you’re storing a lithium-ion battery for more than a week, make sure you given them a “storage charge” to 3.80v per cell (3.85v for LiHV). This will prolong the life of the battery. Good chargers will have a storage charge setting, and will be able to charge or discharge as appropriate to get to the right voltage.
Some drones have a colomb counter to accurately indicate the remaining charge of a battery. Others just show battery voltage; this is a crude indicator as the voltage is also affected by power draw due to internal (and external) resistance – and the fact it’s extremely nonlinear.
In any case you must ensure that the voltage doesn’t go below 3.3v per cell unloaded and 3.0v loaded. Available charge is nearly zero at around 3.5v per cell.
Most drones will warn when the battery is low – in that case land as soon as you can as over-discharging a battery can damage it significantly.
Meteor 75 Pro
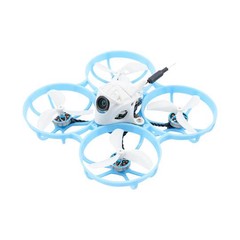
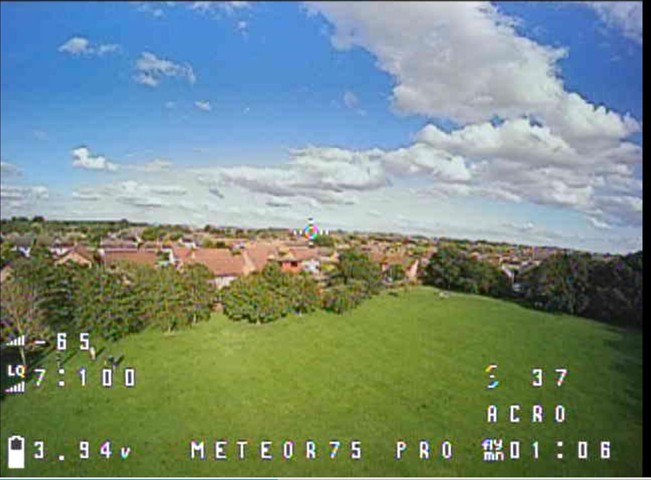
After flying a camera drone for a while, line of sight (no FPV goggles) I got an FPV drone – the BetaFPV Meteor 75 Pro analog edition. It’s a tiny whoop – a class of drone known for being, well, tiny and weighing around 30g.
I practice with a pretty snazzy simulator setup9 to get competent at flying acro mode.
Moving to the real drone (especially due to the googles) was an alien experience. It took probably 6 or so flights to get used to the difference versus the simulator with the initial computer monitor.
In this section I will detail all of the tweaks and discoveries I’ve made along the way with the setup.
I’ve crashed it a lot – most of the time the drone (and props) are fine. However, I’ve had to fix/replace:
- The frame – it snapped
- The camera wires – soldered them back
- The power lead – the insulation was damaged by the props
- The camera UV filter – it came off inside, had to glue it back
- The camera itself – I chipped off an inductor holding it in a vice (won’t do that again)
- The props – they got a bit too chipped and bent
- The VTX leads
I want to make a point: all of these things could be fixed! Every part can be ordered separately and replaced. Refreshing in a world of disposable electronics.
If I do say so myself! ↩︎
Betaflight
4.5.1
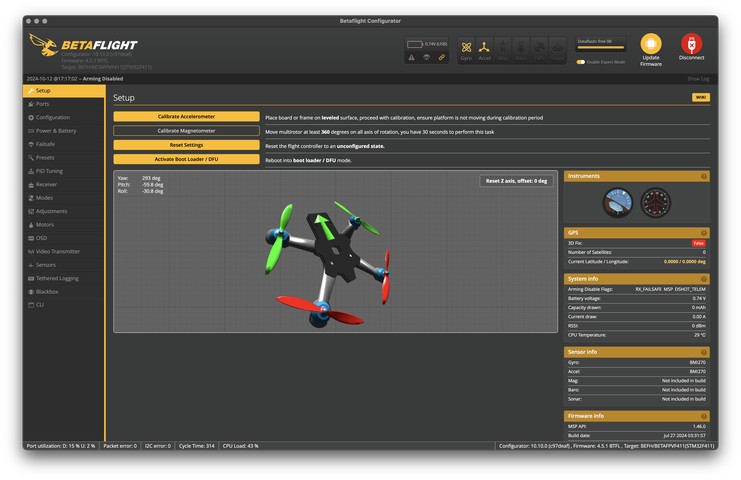
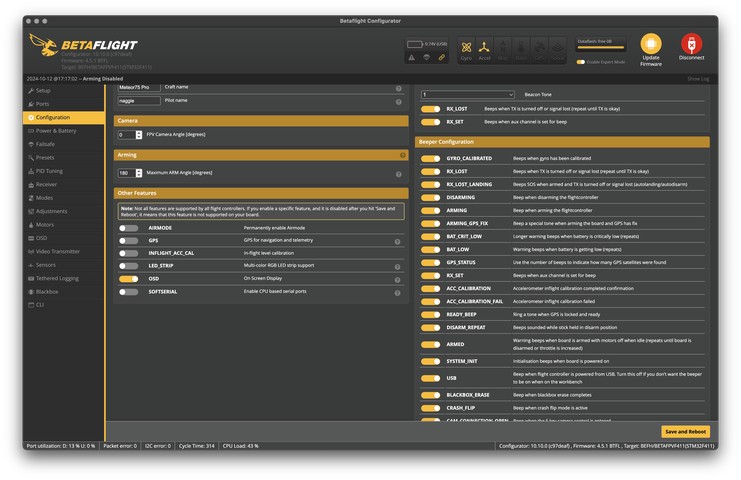
Betaflight, the flight controller firmware has a companion app that provides a slick GUI for configuring the drone. It translates the configuration into serial CLI commands – the same commands are in the backup and preset files that can be generated and loaded. It’s possible to configure the drone without the companion app, but the discoverability and ease of use mean it’s best to use the GUI.
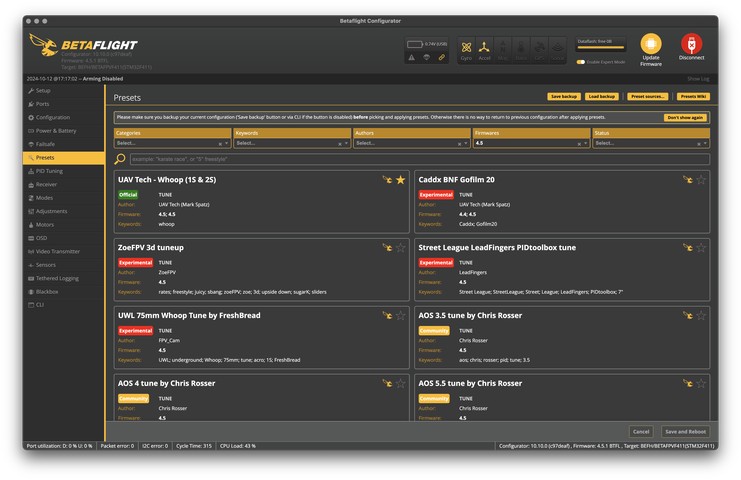
You can also update the firmware via the app, which I did. The drone came with v4.4.0 so I updated it to the latest release at the time. Note: it is necessary to back up and restore the configuration separately else you will lose all your settings!
The stock configuration is available from the BetaFPV website should you lose it.
Note that also some settings change, so make sure you read the release notes and check the configuration after restoring; else you might get a mid-flight surprise like I did! I only noticed the OSD was missing after I had taken off.
To connect the drone to betaflight, you need a micro USB cable which is not included. Note: not all USB cables are equal! I had to try 4 cables until I found one that worked reliably.
Particularly with micro USB, the cables often don’t have data connections at all! The ones that do may also have a thin cable gauge resulting in voltage drop and the flight controller disconnecting erratically.
Another thing to watch out for is that the VTX gets rather hot if there’s not airflow due to flight. Make sure you have a fan blowing on the drone when you’re configuring it; else you may notice a hot electronics smell and suffer disconnects. Particularly in a tiny whoop, there’s no weight budget for a fan or heatsink for better cooling.
I’m not sure if the VTX would cook itself or reduce power if you left it on. Its frequency will also drift all over the place.
Camera angle
30 degrees (default)
The camera angle affects the cruising speed of the drone. A higher angle means it is more comfortable to go faster and still see what’s ahead of you instead of staring at the floor and crashing.
When you’re trying to go slow, for instance inside a house, it can feel awkward with a high angle however – resulting in a tendency to go fast and again, likely crash!
Around 25 degrees is typical. You may want to try less indoors or just get used it.
By default, the camera angle on the Meteor is 30 degrees. It is possible to adjust this, but frustratingly, the camera mount is not adjustable without disassembling the hood and swapping for an alternative (included) camera bracket.
Given this was a pain, and the Meteor is fast enough to live up to its name, I decided to get used to 30 degrees – and match that in the simulator of course.
Note for really fast drones, if you intend to go fast for long stretches (racing) you may want a 45 or even 60 degree angle.
Rates
Movement:
| Axis | Center Sensitivity | Max rate | Expo |
|---|---|---|---|
| Yaw | 100 | 670 | 0.5 |
| Pitch | 100 | 670 | 0.5 |
| Roll | 100 | 670 | 0.5 |
Throttle:
| Limit | Center | Expo |
|---|---|---|
| 100 (default) | 50 (default) | 0.5 |
Rates! You’ll often head about people talking about them and how to set them up. It’s quite complicated unfortunately, but it’s possible to approach it systematically and arrive at something that works for you. Josh Bardwell made a great video on how to set them. so I recommend you watch that – but only after getting used to the default betaflight rates and flying for some time in acro mode; this way you’ll know what’s better or worse. Oscar liang also wrote an article that’s worth reading.
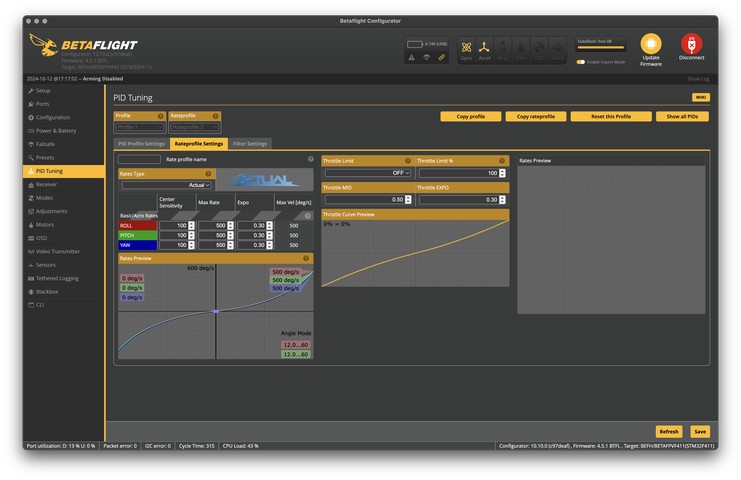
The default betaflight rates are actual: 70 center, 670 max, 0 expo for all yaw, pitch and roll with a linear throttle.
What does that mean? As explained earlier,10 the sticks control the rate of rotation in acro mode – the rates don’t apply in angle mode except with yaw. The numbers describe the curve that maps a stick position to rate of rotation.
There are several mathematical ways to describe the rate curves – betaflight supports 3. The modern one to learn is called actual – this is because the variables are independent which makes tuning much easier.
Generally, to perform quick maneuvers without compromising control it is essential to have a non-linear rate response. It’s possible to fly with linear rates but it’s limiting.
Here are the meanings:
- Centre rate: The sensitivity at the centre of the stick. This is the gradient of the curve at the centre.
- Max rate: The maximum rate at full stick deflection. It’s how fast the drone can possibly spin. Note the physical capabilities may limit the reality!
- Expo: 0-1, the transition between the centre and max rate. It’s a variable that makes the drone more or less sensitive around the centre of the stick.
Here’s Joshua Bardwell’s algorithm for choosing rates:
- Set only centre rate, max rate 0. Fly around without snap moves. General flying. Note if you hit full deflection. Expected range 50-300
- Set max rate. Try full deflection flips, 180 360 etc. Expected range: 500-900
- Add expo if desired to adjust transition between the mid and full point, 0-0.7 expected. I found it was useful after I missed the control of no mac rate!
When setting the rates, I found orbiting was the most useful maneuver to determine if my rates seemed right. Second to that, flying in tight spaces and third, tricks.
The response of the throttle can also be adjusted. It’s possible to fly without adjusting the throttle curve. But given how powerful modern drones are, a huge amount of thrust can make hovering (and therefore flying indoors) much harder. The antidote to this is throttle expo! I now fly with 0.3 expo on the throttle and it’s made it much easier to fly indoors without bouncing around all over the place. If you want throttle expo, expect something between 0.2 and 0.3.
The Meteor hovers at around 37% throttle. I thought – What if I set the throttle mid point to that? I will try it out. Oscar Liang recommends it. As it turns out, I ended up hitting the floor at lot and the default of 50 seemed better.
By the way, despite being comfortable with the controls now, I’m still not sure about my rates. Keep experimenting in the simulator! I’ve found rates matter less with experience, meaning you don’t have to worry too much. Start again with Joshua’s algorithm a lot to make it clear why you’re making changes, and to avoid over-optimising and getting stuck in a local maxima!
Let’s hope, I wrote this article out of order :-) ↩︎
Cells
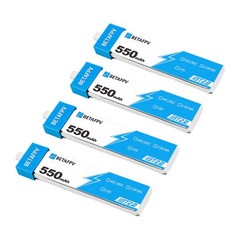
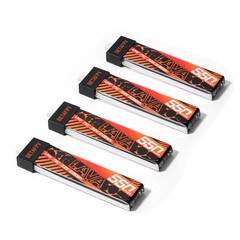
BetaFPV 1S 550mAh
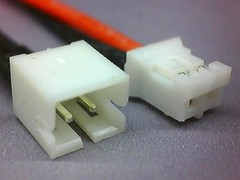
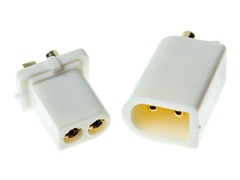
The Meteor is compatible with BetaFPV 1S cells, suggested 450mAh and 550mAh. They have the BT2.0 connector – a proprietary connector that does not suffer from significant voltage sag (due to lower resistance) compared to the industry standard of JST PH2.0. Note that there’s a similar connector from GNB called the A30 – it’s close enough to be compatible.
The BetaFPV LAVA cells use a “folded cell” design, like many other high performance 1S cells likely from the same factory. The advantage here is again lower resistance so less voltage sag.
What does this mean? The drone will fly with more power available and for longer despite the capacity being the same. This is because the voltage will stay above the usable threshold for longer as the dips are smaller.
However, I found that all my LAVA cells were unusable after a month of flying with a month off – stored properly. I therefore recommend the standard cells instead.
Crash recovery mode
Enabled
In acro mode, if you crash (and you will a lot) the drone can other wise go a bit crazy making recovery difficult. The relatively new crash recovery mode levels the drone immediately, faster than you could otherwise yourself. It’s great! I crash far less than I would otherwise due to this feature. Enable it!
Fortunately due to the prop guards and low mass of the drone crashing won’t likely cause damage. Though it will eventually if you fly regularly enough!
Turtle mode
Toggle switch
If I do actually crash it’s often upside down meaning you have to find the drone (not always easy!) and flip it over. “Flip over after crash,” AKA “turtle mode” makes use of reversible motor controllers to spin 2 props in reverse and flip the craft.
To use it, set a channel in the configuration to enable “flip over after crash” mode on a switch.
When the drone is upside down, flip the switch and arm the drone. You can then try punching pitch and roll (no throttle) to flip.
Crash recovery and turtle mode combined mean it’s a much more enjoyable experience as it reduces the time spent wandering to recover the drone by an order of magnitude
OSD
I have configured the OSD to reduce clutter a bit. Here’s my current layout, in the OSD section of the betaflight configurator:
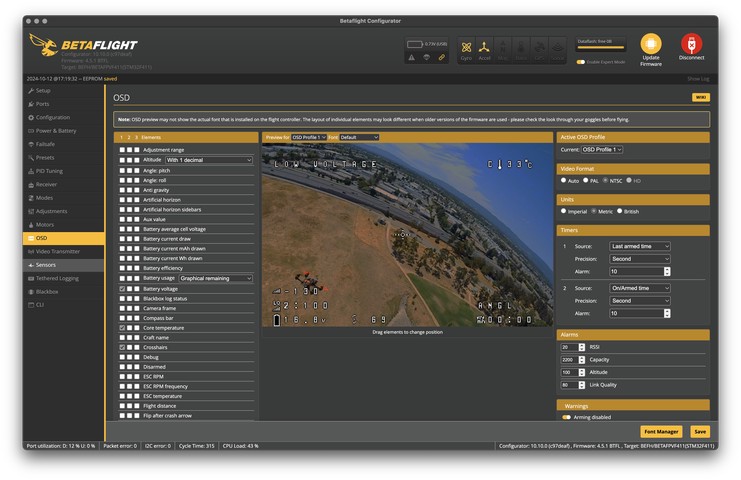
The system is a WYSIWYG editor – you can drag and drop the elements to where you need them. Neat!
For some reason (probably something to do with not reading the release notes) the OSD stopped working after I upgraded to Betaflight 4.5.1 and restored the config. I had to re-enable it in the configuration tab.
See this article for more information.
Telemetry
Enabled
Telemetry enables the transmitter to display flight information such as battery voltage. For some unknown reason this was not enabled by default. I enabled it so I could program EdgeTX to warn me verbally when the battery gets low.
Vbat sag compensation
Off
The battery voltage will sag as the battery is depleted. The betaflight firmware is able to compensate for this by scaling back the throttle proportionally at the start of a flight.
I turned it off for more available initial power, and more importantly it enables be to feel the difference when the battery is almost spent.
Channel mapping
I have the channel maps configured to align with the channel outputs I’ve configured on the transmitter.
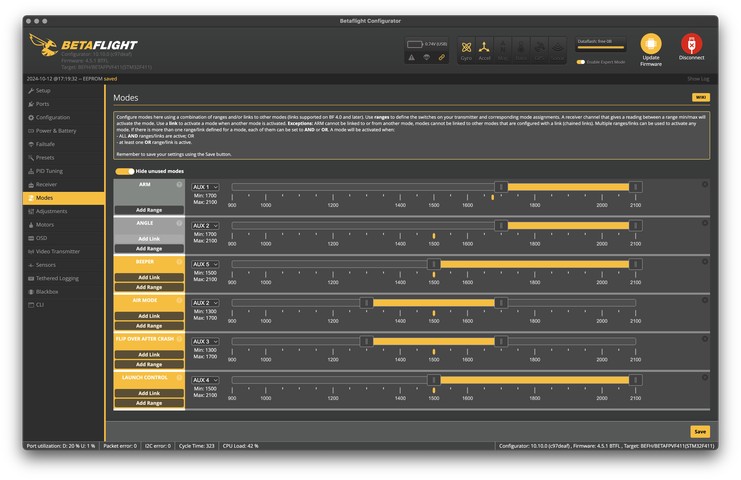
Generally each button is mapped to a channel, and each channel has a 10-bit associated integer value. This 10-bit value has its roots in the PPM signals that would have been sent directly to a servo.
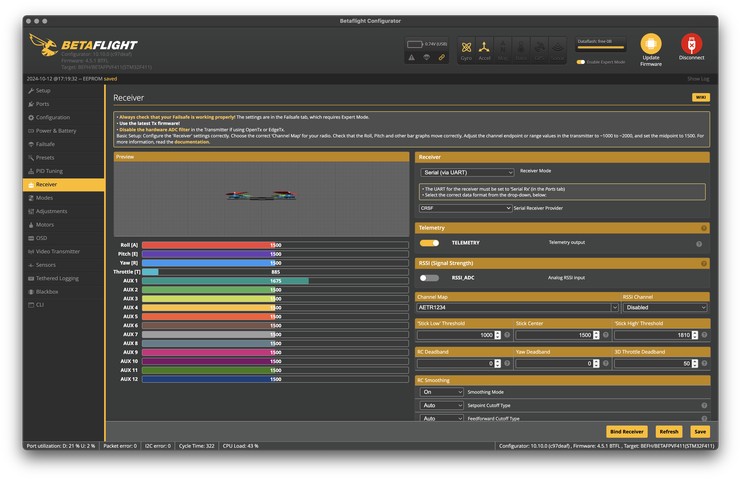
Nowadays, the channels have a min/max value inside that range to allow for sanity checking.
A 3 position switch will send a signal at approximately 1/3rd steps within the min/max range. In reality, over the air the radio protocol may only use 2 bits to convey this information for efficiency and latency reasons.
VTX configuration
Raceband 1, 400 (350) mW in theory, to have maximum range and avoid WiFi interference.
The VTX is configured at just 25mW by default. This is enough but does limit range and penetration outdoors.
Assuming I could be compliant with the radio equipment directive, I would set the VTX to 400mW. This is not possible in the UX without potentially upsetting Ofcom and the local amateur radio enthusiasts.
Increasing the output level will increase range and penetration, but result in much more heat meaning more cooling is required and higher power consumption. Given the motors can draw far more current, this shouldn’t have a noticeable effect on flight time.
Assuming equivalent noise characteristics and ideal conditions, the range would increase by a factor of 2 every time you quadruple the power output. In theory you could get 4x the range at 400mW vs 25mW. In practice, the surrounding environment, antenna orientation and RF noise make it less than that.
Note that most VTXes are tuned to output more power in lower frequencies. A lot of sources recommend raceband 8 to be as far away from WiFi as possible; however even raceband 1 is far away from most WiFi channels.
Motor controllers
BlueJay v0.21.0 at 96kHz
The Meteor comes with a 4-in-1 flight controller, which includes 4 motor controllers. The integration is a necessity here due to size and weight constraints. Interestingly, there are 4 different processors/firmwares to update.
BlueJay 0.17 flashed on all 4 motor controllers. I upgraded it to 0.21.0, the latest, figuring I may as well to also update the motor modulation frequency.
BlueJay is an open source ESC (electronic speed controller) firmware, based on BLHeli.
The motor controller synthesises sine waves to enable a proper 3-phase power supply synchronised with the position of the motor via back-EMF sensing.
96kHz, 48kHz and 24kHz are available options. 96kHz is the smoothest and most power efficient, but has least authority. Apparently good for flying indoors. 24kHz has the most authority but is less efficient resulting in worse battery life. 48kHz is a good compromise according to Oscar Liang’s review. See Chris Rosser’s video on ESC settings for more in-depth information; there is more to it than just the frequency.
To flash, you could set up a local toolchain on your laptop or take the easy route like me, and use https://esc-configurator.com/ with Chromium browser via the web serial API. All you need to do is connect the drone and make sure betaflight is not running. You can then detect and flash each ESC.
Make sure you also set the startup power to 1125 and max power to 1200 like the default. I forgot to do this, and it resulted in props failing to start some of the time.
I ended up settling on 24kHz – performance is far better, particularly when recovering from dives or making sharp turns. The battery life does suffer a bit, and I get temperature warnings as the motor controller is working harder.
I noticed that this also helped with starting the motors – despite setting a greater start power, after a few months the motors were failing to start. I suspect the bearings are getting a bit worn – the extra authority of 24kHz meant that the problem went away at least for now.
PID tuning
UAVTech 1s/2s Tiny Whoop preset
I loaded the 1s/2s tiny whoop preset from betaflight after comparing it to some unstable recommendations and the default tuning. It was noticeably better.
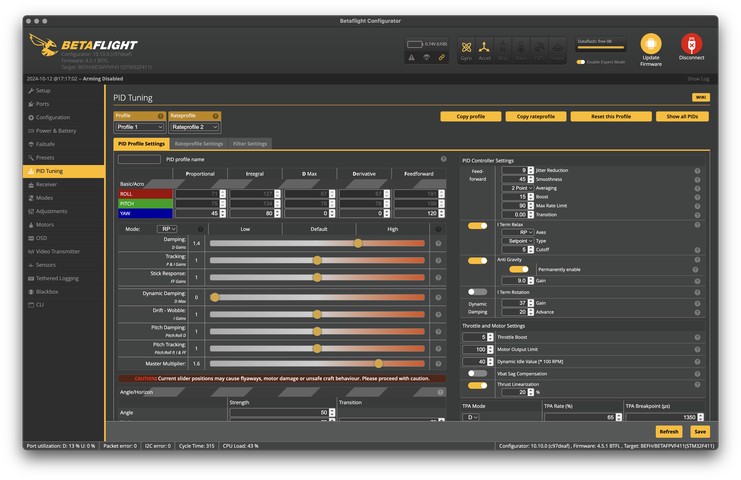
Drones use a PID controller in combination with a MEMS gyroscope to make the drone move according to the given input.
When tuning a drone, the variables that influence the response of the drone are manipulated until the drone flies as desired. Betaflight has some rather advanced tooling to enable tuning – integrating with the “black box” recording features (with visualisation) to allow for a data-driven approach to tuning.
I won’t go into PID control or tuning here – it’s a deep subject.
Air mode
On a switch
Air mode is a setting that keeps the PID loop running even if the throttle is at zero. This is useful to retain control when descending and particularly outdoors in wind.
I have it on a switch, off by default as it can cause the drone to go bananas if you get too close to walls inside. It was permanently on by default.
Angle mode
On a switch
Defaulting to acro mode, I have angle mode on a switch for 3 reasons:
- If someone else wants to fly for the first time, it’s easier to control
- If I lose video signal I can use it to quickly level and punch out
- For occasional line of sight flying.
Angle mode can also make it easier to fly indoors. I committed to learning acro mode everywhere so I don’t use it.
Some tiny whoop racers prefer angle mode even outside due to crash stability; however I think crash recovery mode (see the section) negates the need here.
Firmware
BlueJay v0.21.0for the 4 motor controllersBetaflight 4.5.1for the flight controllerExpress LRS 3.4.3for the receiver
Radiomaster pocket
The radiomaster pocket is an inexpensive transmitter – but that’s not the only reason to buy it. It’s small and therefore portable, with a sufficient number of toggle switches plus a decent screen and speaker. It has an expansion bay too, to upgrade the radio capabilities and good battery life.
I got the ELRS version. Make sure you get the right one, there’s a C2500 version as well! The C2500 version can’t speak Express LRS, rather FrSky and others.
I updated the firmware of the receiver to the latest EdgeTX, complete with a new SD card config and Express LRS firmware update too.
I don’t really feel the need to upgrade right now.
Gimbals
You can control the gimbals by pinching or thumbing. I prefer thumbing just because it feels more natural, probably because of my big hands and the small transmitter.
To support this better I printed adaptors to lower the gimbals with some 2x8mm self-tapping screws. This makes it more comfortable to hold and possibly easier to fly.
The radiomaster pocket has hall effect gimbals – these don’t rely on a physical wiper and resistance track unlike cheaper potentiometer based gimbals. Not bad considering the price.
Radiomaster has recently released some “nano AG01” gimbals which are made from solid CNC aluminium. They can be bought separately and swapped out. You can also get upgraded sticks, some that are more like a game controller for thumbing. I may try both.
Voice alerts
EdgeTX comes with lots of WAV files on the SD card which can be directly assigned to events (such as a button toggle) within the model or radio configuration. It doesn’t only sound cool, but it’s useful as you can’t see the controller with googles on.
I have made sure every button press has an associated alert – EdgeTX comes with lots of alerts built in but you’ll find you’re missing one even though there are hundreds. What’s the solution? To generate more!
EdgeTX has a git repository containing WAV packs for various voices and languages, as well as generation scripts. Looking at the mechanism, a CSV file of all the alerts texts is the input. I figured I could make a script to parse this and generate my own WAV files with my preferred engine.
I really like the Piper TTS engine. It is incredibly natural sounding, lightweight and AI based. I made a script to parse the aforementioned CSV file and generate WAV files using Piper, and then convert them to the required 16-bit 32kHz mono PCM WAV files using sox.. All in parallel!
You’ll notice the parent repository actually tracks the contents of my EdgeTX SD card. This is because I version control it with git, and I can easily see what I’ve changed and revert if necessary. It’s also a good backup!
Switch configuration
I change my switch configuration quite a lot. Not all features are supported by my current drone.
SA– ArmSB– Acro / Air / Angle modeSC– Flight / Turtle / GPS rescueSD– Position holdSE– BuzzerS1– Volume control
Low battery alert
I have set a low battery alert to trigger at 3.2v with a 2 second delay. This is rather low, but appropriate for a 1s drone as there’s no risk of an unbalanced cell going below 3.0v.
This is implemented with a special function, only in effect when the arm button is activated.
I set a custom TTS alert: “Low battery, land now.”
Throttle scaling, etc
I have experimented a fair bit with scaling the throttle and pitch/roll/yaw rates on the knob and a switch. That’s the great thing about EdgeTX – you can set logic and transformations (even lua scripts) to modify the behaviour of the controls in pretty much any way you can think of.
Scaling the throttle may also improve your flight times as the drone will be more efficient at lower throttle levels; you could just fly slower without a limit of course!
I found scaling the throttle to be useful for indoor flying at first. I scaled it from 50-100% with the rear (S1) knob using this guide and moved to a switch as I preferred using the S1 knob for volume control.
To save you some bother, I found iterating on my rates and using expo was better overall to allow flying indoors and outside, resulting in potentially better muscle memory as the stick response is fixed.
Express LRS module
250Hz, 250mW dynamic power
The Express LRS project provides a lua script which allows remote configuration of the receiver from the transmitter. Once the module is activated it is possible to control the transmitter and receiver module from the transmitter.
I have set maximum power (250mW) but with dynamic power enabled. This means the transmitter will monitor the reported receiver link and adjust transmit power – great to increase battery life. Note at max power, the transmitter will be using far more than 250mW.
I find that due to the magic of LoRa, the transmit power doesn’t go much above 10mW most of the time.
I left the packet rate at 250Hz; significantly more than other radio technologies. I could not notice the difference with 500Hz or 1000Hz set so I didn’t compromise the range by doing so.
Telemetry screen
Battery voltage etc.
I have configured the telemetry screen to show battery voltage. It also shows TX power which is interesting as I have dynamic power set. When using the simulator, and even far away outdoors, it doesn’t even go above 10mW most of the time!
This screen is useful if you have your goggles off.
BetaFPV VR03
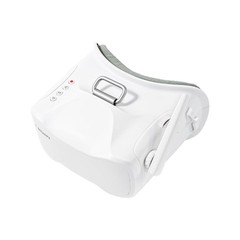
The BetaFPV VR03 is one of the cheapest available analog FPV goggles. They don’t look ridiculous unlike others available in the same price range, and I reckon they’re pretty good! Not fantastic, but definitely good.
The screen inside is 800x480 which is a step up from the 480x320 screens in other similar googles. There’s recording functionality too, which uses an MJPEG codec – not the best quality output but usable.
My drone has a 4:3 aspect ratio, which is stretched to 16:9 on the screen. I thought this would irritate me, but it doesn’t at all.
One downside is the receiver – there is no diversity set up and only a basic antenna. I bet a more expensive set of googles would result in better range. At least the antenna is replaceable.
Whoopstor v3
I recommend this charger. Using USB-PD it can charge 6 1S cells at once. Importantly there is a storage charge option – useful if you’re not going to fly for a while.
The fan is loud and intermittent though.
What’s next?
I’d like to get some digital gear. Probably the Walksnail Googles L, with a Caddx Gofilm20 or Flywoo Exlorer LR4. I may upgrade to a Radiomaster Boxer or Jumper T15.
I have ordered a tiny GPS module (above) for the Meteor to try out GPS rescue mode and add distance / speed readouts to the OSD. It may seem pointless for a tiny whoop, but as it weighs only a few grams I don’t think it will affect the flight characteristics too much; especially considering the digital version weighs 5g more anyway.
Thanks for reading! If you enjoyed this article or have comments, please consider sharing it on Hacker news, Twitter, Hackaday, Lobste.rs, Reddit and/or LinkedIn.
You can email me with any corrections or feedback.
Tags:
Related:
